How to Rig a 3D Model?
To make it easy, here are four major steps by which the whole rigging process is made up:
Step 1: Skinning
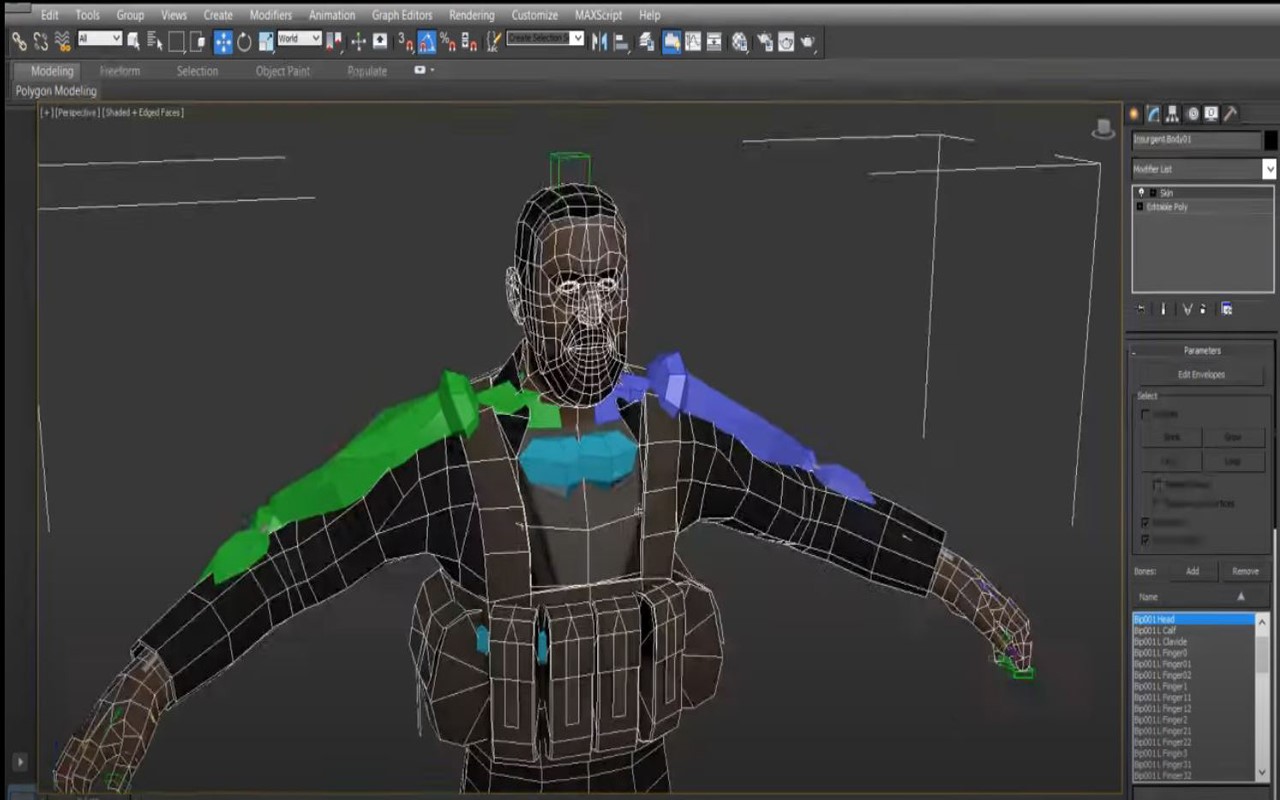
The first step is called mesh or skinning. It begins by building several bones to represent the skeletons of the models (polygonal geometry). The process starts with creating and setting bones and joints that function as the model’s armature. After that, the skin and the bones are joined together.


Step 2: Building Controllers
Building controllers is the next step. They represent various geometrical forms to control the effects of every aspect of the model’s movement and help animators understand the role of controllers. Several of these shapes include:
- The model is rotated and translated using a diamond. It is used for the figures’ hands, feet, and central parts.
- To translate controls, use the Cube.
- The sphere enables rotation. Generally, it is used for the torso, pelvis, and neck.
- Trapezoids are applied to joints. The elbow and knee are the most commonly used joints.
The process of designing the skeleton is now complete. The character rigger should now insert movement patterns and facial expressions into the model. Every movement’s connection between the bones is hierarchical, just like a parent and kid. A character’s hand and forearm bones in a 3D model move together with the shoulder. Because the character rigger does not have to define actions for every model component, thanks to this relationship, rigging is solved simply.
Step 3: Weight Painting
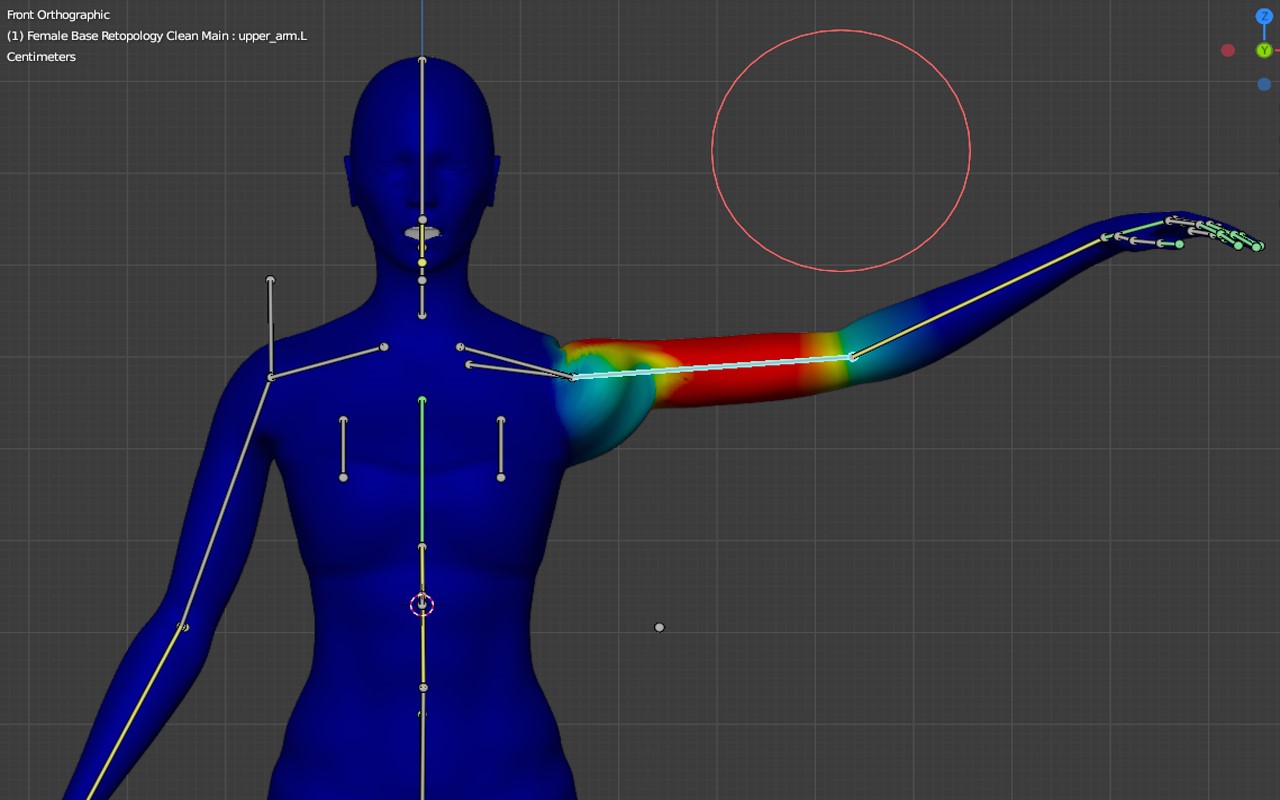
The third step includes the joints different from those mentioned in step one. The joints limit models’ ability to move around, and weight painting is another essential factor in this process. The weight scale shows how each part of the 3D model connects to the others. It means that the model’s realistic and natural physiologic rigging depends on how much a part’s weight affects a bone during movement


Step 4: Forward and Inverse Kinematics
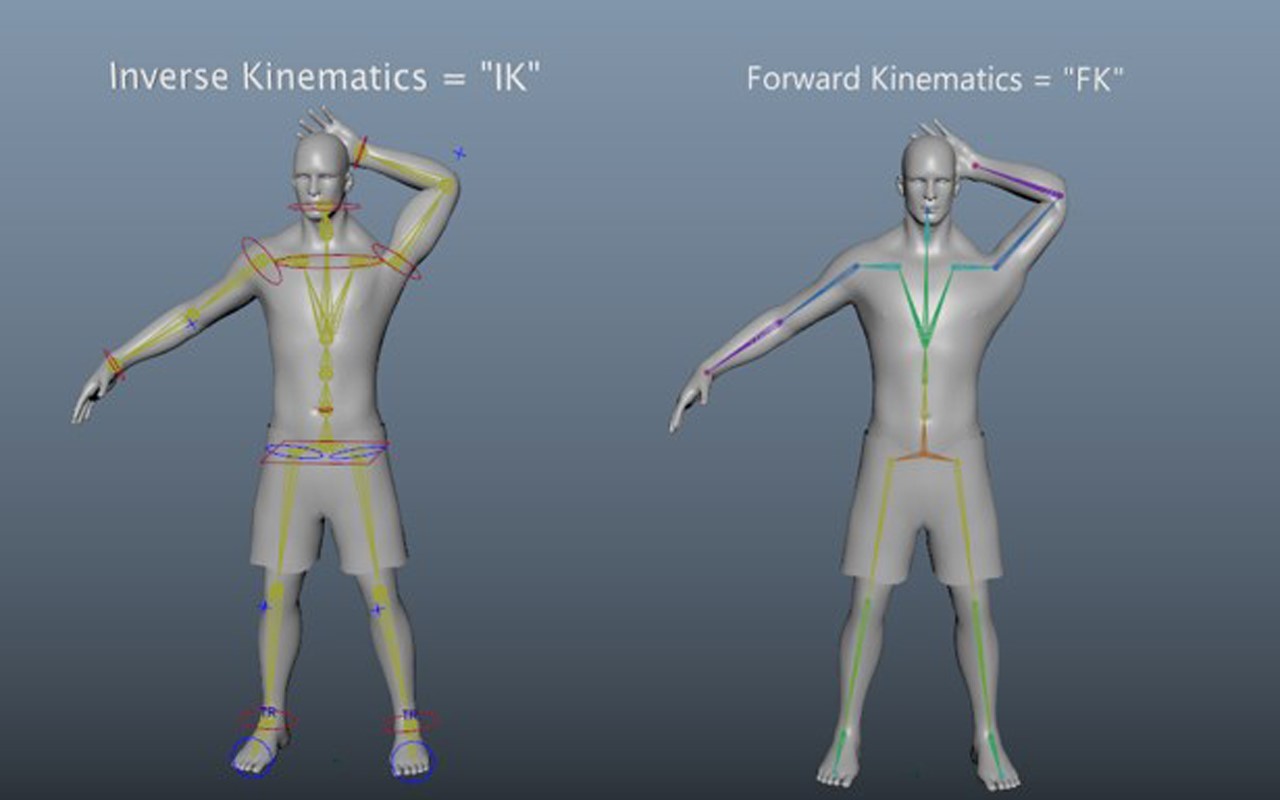
Forward and Inverse Kinematics comes in the fourth step. As mentioned before, Hierarchical relationships exist between the bones. “Forwarding kinematics” is a term that refers to the idea that movement in a model’s upper parts also influences its lower parts. On the other hand, inverse kinematics refers to the animation of lower parts separately from upper parts. The animation process could be much easier with “IK”.
Making hard-body rigs
A rig can also be used to animate hard-bodied objects, although this requires logical object parenting and control nulls. Although joints are a choice, hard-bodied rigs typically use them less frequently.
An automobile rig, which offers a single steering control and spins the wheels at the ideal rate, is an excellent example of a hard-bodied rig. The difficulty or simplicity of these rigs depends on the needs of the shot.


